Hiking Report: ACT

Team member: Liu Yu, Guo
Time: September 2017
Length: 130km 10 days
Location: Nepal
Difficulty: 4/10
Nepal is not only rich in mountainous terrain, but it’s also a country with a uniquely culture. Whether you’re trekking beneath snowy peaks, scaling cliffs, wandering through rainforests, rafting in rapids, or getting lost in temple-filled alleyways, it won’t take long to understand why some explorers dedicate their entire lives to exploring this small country.
If you hold your beliefs somewhere high among snow-capped peaks, and see the outdoors as an inseparable part of life, then Nepal’s majestic mountains should be on your travel list.
And if you’re not good at sleeping in a damp tent, dreaming of a hot cup of coffee and a crispy slice of apple pie beneath the golden glow of sunrise on the Himalayas—then the Annapurna Circuit Trek (ACT) is absolutely your first choice..

The Enchanting Mountain Village of Tal

The Annapurna region offers numerous trekking routes, but the Annapurna Circuit stands out as the longest, most diverse in scenery, and richest in cultural experience. It may not offer the comfiest accommodations, but it far outshines the Everest Base Camp (EBC) trek in many ways. Compared to the more commercial Annapurna Base Camp (ABC) or the shorter Poon Hill trek, the ACT’s scenery is bound to leave you awestruck.
If the Everest region’s EBC is a snow-capped banquet, then the Annapurna Circuit is the full family-style combo meal, mixing breathtaking mountain views with deep cultural immersion.
The ACT around the 8,091-meter Annapurna in a horseshoe shape. The full route spans 211 kilometers (131 miles) and typically takes 16–21 days to complete. However, as roads now cover over 90% of the trail, many trekkers compress the journey into just 7–8 days.
The trail begins at the low-altitude town of Besisahar (820m) and ascend steadily to the Thorong La Pass (5,416m). This elevation gain brings dramatic changes in vegetation and terrain, keeping things visually fresh the entire way.
Along the route, you’ll pass through numerous ethnic regions—each with distinct architectural styles and cultural traditions.
In the southern, lower-altitude sections, Hinduism and Buddhism coexist. But as you ascend into the high alpine zones, the influence of Tibetan Buddhism becomes dominant. Some locals follow Nepalese Buddhism, while others follow traditional Tibetan practices.

High Altitudes Trail

A Non-Traditional Route Through Mesokanto La
Instead of the standard Thorong La Pass route, we opted for a variation—crossing the less-traveled Mesokanto La Pass. This offered a richer cultural experience through Manang and Khangsar, followed by two days of remote wilderness with no lodges in sight. The reward? Absolute solitude and stunning, raw mountain views.
Compared to Thorong La, Mesokanto La is on man’s land, without established lodges. Being closer to the snow peaks, the scenery is even more dramatic—but this route demands better gear and experience, as camping is required. It’s only accessible during a short window each year and bypasses several historic Tibetan villages. This pass is also the pass through which humans passed on their first attempt to explore Annapurna, where the expedition had to return after seeing the Great Barrier on the northeast of the Tilicho Peak.
Trip Itinerary Summary
Day 1: Kathmandu → Besisahar → Bhulbule
Day 2: Bhulbule → Ghermu
Day 3: Ghermu → Tal
Day 4: Tal → Timang
Day 5: Timang → Chame
Day 6: Chame → Upper Pisang
Day 7: Upper Pisang → Ngawal
Day 8: Ngawal → Manang
Day 9: Manang → Khangsar → mid-route lodge
Day 10: Mid-route lodge → Tilicho Base Camp → Tilicho Lake Camp
Day 11: Tilicho Lake → Mesokanto La Pass → 4600m Camp
Day 12: 4600m Camp → Jomsom
Day 13: Jomsom → Pokhara
Note: Days 10–12 follow a non-traditional, more difficult path and require camping gear. Not recommended for inexperienced trekkers.
Day 1: From Kathmandu to Besi Sahar
Travel time by bus: 6–8 hours
There are many ways to get from Kathmandu to the starting point of the trek. Most trekkers choose either a local bus or a tourist bus for foreigners. Both options are very cheap (about 400–450 rupees), but if you’re unlucky, you might end up on a bus in terrible condition, with long and unexpected delays. A smaller number of trekkers opt to hire a private car or take a 4WD vehicle, which is faster, but the cost is very high.
If you’re trying to strike a balance between time and budget, a mini bus is a good option—it costs around 500 rupees. Finding one is easy: just hop in a taxi and tell the driver you’re looking for a mini bus to Besi Sahar. The driver will take you straight to the bus. If you’re leaving from Thamel, the taxi ride will cost around 300 rupees.
On the bus, we met a Malaysian hiker Yikean, who was heading to Besi Sahar to meet up with a Spanish friend and hiking the ACT.
If all goes smoothly, you should reach Besi Sahar between 3:00 and 4:00 PM. From there, you can either hire a car to drive you directly into the ACT start point, or take a local bus to Bhulbule, where you’ll find lovely garden-style guesthouses perfect for a peaceful overnight stay. Don’t worry too much about the local bus conditions—Nepalis are warm and welcoming, and they won’t let you stand in the aisle getting tossed around on those mountain roads.
After a friendly conductor invited us aboard, my friend and I found ourselves riding alongside locals as the bus made three loops around the small town of Besi Sahar, picking up passengers. On this colorful, exotically decorated bus, people weren’t just sitting or standing—they were also clinging to the outside or riding on the roof! It’s the kind of wild, unforgettable experience you don’t often find elsewhere.
Just past Bhulbule, you’ll come across several garden-style lodges—it’s highly recommended to stay here. If you push on past that point, you might find yourself hiking well into the night before you reach the next lodging option, which could be a dark, damp place you’d rather avoid.
Unfortunately, that’s exactly what happened to us. Unaware of what lay ahead, we kept walking late into the night and finally stumbled upon a run-down shop in Ngadi, perched on a hillside. We ended up staying in a drafty, flimsy wooden shack with tropical insects crawling along the walls. To save on fuel, the owner had even removed the gas canister from the water heater.

The roaring Marsyangdi River, by the way, is also a popular white-water rafting destination.

Day 2: From Bhulbule to Ghermu
Hiking time: 6–7 hours
Today’s hike winds through hot, humid subtropical forest almost the entire way. After a bit of elevation gain, we reached Bahundanda (1,270m), a small village perched on the hillside. Its name means “Hill of the Brahmins.”
Bahundanda has a few small shops where you can rest for a while. There’s a little town square with an ancient tree at its center. When we arrived, the locals were gathered around, cheerfully sending off an elderly trekker with a full head of white hair.
There’s also a police checkpoint here where you must register your trekking permit. Don’t skip this step—it’s important for your safety. Some of the nearby shops sell fruit, including homegrown guavas and a thick, stubby variety of banana. Because they ripen on the tree, these fruits taste far better than anything you’d find at a market—highly recommended!
After leaving Bahundanda, the trail descends for a stretch before starting to ascend again at a gentle pace. When you spot a massive waterfall cascading down the left side of the valley, you’ll know you’ve almost reached Ghermu (1,140m), your destination for the night. This area is absolutely beautiful. The guesthouses are built on the right side of the valley, and you can enjoy a clear view of the huge waterfall straight from your window.

The youngest hiker on the trail—just six years old

Day 3: From Ghermu to Tal
Hiking time: 6–7 hours
Elevation gain: +640m
Not long after leaving Ghermu, we crossed a suspension bridge that took us from the eastern to the western bank of the Marsyangdi River. On the opposite side sits the aging village of Jagat, home to a few lodges. For those who took a vehicle into the trail, this is often their first overnight stop.
From here, the trail follows a road for quite a long stretch. Eventually, you’ll see a large boulder painted with red and white trail markers—this is where you leave the road and begin climbing a steep slope on the left.
After passing through a dense forest, we arrived at Chamje (1,410m), a village located right across from a waterfall. In fact, we ended up staying here for the night. Lodging was basic and a bit rough, but the place was packed with trekkers from all over the world. It was here that I had the worst daal bhaat on the entire Annapurna Circuit. A Canadian couple sitting across from us had ordered the same dish—I still remember the look on their faces.
*Daal bhaat is a traditional Nepali meal that usually includes lentil soup, rice, curry, fried bread, and pickles. It’s the least wrong dish on the ACT, and most restaurants do a great job with it.
The Malaysian hiker we met earlier also stayed here. Their group was on a tight schedule, so they were likely to leave us in the dust before long.
Not far from Chamje, we crossed another suspension bridge to the right side of the gorge. After a rather uneventful stretch, we reached a broad, flat valley. This flatness comes from the fact that it was once the bottom of a lake. Nestled on the eastern side of the river is a beautiful little village called Tal (1,700m).
As soon as we arrived in Tal, we couldn’t take another step—we decided to stay. This village is incredibly charming, it’s the most beautiful place along the entire trek. A nearby waterfall provides water for the village. To reach it, you cross a small bridge and follow a steep stone staircase up to its middle section.
The village has rows of cozy wooden cabins available for just 200 rupees per room—an unbelievable bargain, especially compared to prices in Manang, where similar rooms can go for over 1,000. Every lodge has a grassy yard full of wildflowers, and if you not in hurry, I’d highly recommend spending a half-day here to rest and soak it all in.
Tal also offers good resupply options—you can find both trekking gear and everyday necessities. There’s even a safe water refill station where you can buy filtered water for 40 rupees per liter.

The garden village of Tal

We stayed at a place called Sunrise Guest House, run by a young and friendly woman. Her husband was out in the garden building furniture and fixing up a new room. Best of all? We had the most delicious daal bhaat and grilled chicken of the entire trek right here.
Day 4: From Tal to Timang
Hiking time: 5–6 hours
Elevation gain: +1,000m
Leaving Tal, we passed a few garden-style lodges before out of the river valley. Less than an hour in, we crossed a suspension bridge to switch from the east bank of the river to the west. From there, the trail followed a jeep track almost the entire way.
The scenery along this road was relatively unremarkable, but we passed through several small villages. Dharapani(1,960m) is a good place to stop for lunch. It’s a common hub for trekkers—especially those hiking the Manaslu Circuit, many of whom overnight here.


In Dharapani, a guesthouse owner playing with his child in the yard. There’s also a checkpoint here where you must register. One of the staff recommended a side trip to Odar, a nearby village with views of Mount Manaslu. Unfortunately, I didn’t have time to detour that way.。
After passing through Danaque (2,210m), we faced a steep climb. The elevation gain here is nearly 500 meters, and it’s a tough section—most of it through rhododendron forest. Eventually, we crossed another suspension bridge and arrived at our final destination for the day: Timang (2,630m).
Very few people choose to spend the night in Timang, but I did—and for good reason. It’s an incredible viewpoint. If you wake up early, you’ll be rewarded with a breathtaking view of Manaslu bathed in golden morning light.
Day 5: From Timang to Chame
Hiking time: 3–4 hours
Elevation gain: +200m
Today’s hike was pleasantly short—perfect for sleeping in a bit. Still, if you’re in Timang, don’t miss the sunrise over Manaslu—it’s absolutely worth waking up for.
Along the way, we passed through two small villages: Thanchowk and Koto. There’s no real need to stop for lunch in either; it’s better to continue straight through to Chame (2,710m) and eat there. As we approached Chame, the trees parted just enough to reveal a jaw-dropping glimpse of Annapurna II (7,937m) rising in the distance.
Chame is the district capital of the Manang region, and it feels like a proper town. There’s a hospital, a pharmacy, outdoor gear shops, a police station, a monastery, a bank, and even a hot spring. The road here is so well-developed that if someone really wanted to skip the walk, they could technically hire a vehicle from the trailhead all the way to Chame. The mobile signal is not bad throughout the town—one of the few spots on the trail where you can browse the internet at decent speeds.
There are tons of guesthouses here. It’s worth walking a bit farther into town, where many of the newer lodges offer better rooms and tastier meals. After dinner, be sure to take advantage of the free natural hot spring—you won’t have many chances to bathe in the coming days, so make it count.
That evening, the skies cleared after a brief rain. From the rooftop of our lodge, we watched the golden light of sunset paint the face of Manaslu—an unforgettable moment.
Day 6: From Chame to Upper Pisang
Hiking time: 5 hours
Elevation gain: +600m
From today onward, the landscape begins to change dramatically. Alpine conifer forests gradually replace the lush broadleaf trees, and the vibrant green hills give way to towering mountains in hues of white and ochre. Leaving Chame, we officially step into the high-altitude realm of the Himalayas. Even the architecture starts to shift toward a more traditional mountain style.

On the trail, we passed a young girl selling fresh apples to trekkers—a charming little reminder of how life continues in these remote villages.

Bhratang makes for a good lunch stop. It’s home to large apple orchards, and you can buy fresh apples, apple juice, and even a slice of apple pie. The apples here are small, bright red, and noticeably tart—very different from the ones back home.
The trail follows the right bank of the Marsyangdi River, carving its way along a rocky cliff path hewn from giant boulders. At a suspension bridge, we left the road and crossed to the left side of the valley, where the scenery takes a dramatic turn. This is where you’ll see the mighty Paungda Danda—a colossal slab of rock that rises nearly 1,500 meters in a single sweep. Locals call it Swarga Dwar, the “Gate to Heaven.” According to tradition, souls of the deceased must cross over this wall of stone to reach paradise.
Honestly, it’s easy to see why they believe that. As the trail bends around the curve of this so-called gate, the forest begins to thin, and what appears ahead is a breathtaking panorama of snow-capped peaks—it truly feels like entering another world. This is a feature of Tibetan Buddhism that combines natural wonders with religion.
In the past, most trekkers stayed in Lower Pisang (3,240m), but in recent years the Annapurna Conservation Area Project (ACAP) has redirected the official route to Upper Pisang (3,310m), perched higher up on the mountainside. The scenery from here is far superior to that of the valley floor, with sweeping views of the surrounding peaks.
Upper Pisang is a traditional Tibetan-style village, and while the lodging is basic—there’s often no running water, frequent power outages, and tight accommodation—nearly every trekker opts to stay here for one very good reason: it offers one of the best sunrise views of Annapurna II on the entire circuit.

A hiker meditating before the snow-capped peaks

Day 7: Upper Pisang to Ngawal
Hiking time: 6 hours
Elevation gain: +500m, loss: -200m
Today’s trail follows the right side of the valley, almost entirely along a cliffside pathway. Before reaching the traditional Tibetan village of Ghyaru (3,670m), we encounter a steep ascent. At the entrance to the village stands a white stupasurrounded by prayer flags, creating a serene and sacred atmosphere beneath the snow-capped peaks.

In the early morning, we observed the guesthouse owner creating a totem out of colorful dough. It is said to be for a religious ritual, adding an extra layer of local culture and mysticism to our experience.

Given the relentless exposure to the sun today, make sure to carry enough water, as there are very few places to refill along the way.
The views along the way are spectacular, especially of Annapurna II and Annapurna III. At one bend in the trail, I managed to capture a photo of this awe-inspiring landscape.
Fearing the accommodation shortage that we had experienced in Upper Pisang, we decided to “settle” in the first guesthouse we found upon reaching Ngawal (3,660m). The drafty wooden shack creaked and groaned in the gusty winds that howled through the night, but we were fortunate to meet many interesting people: a Canadian couple traveling the world and two French uncles who were skilled in singing and storytelling.
The Canadian couple had suffered from altitude sickness, but thankfully they had brought Acetazolamide from lower down. One of the French uncles, an old hippie type, never forgot his guitar, strumming and singing along as he hiked. The other French uncle, who spoke excellent Chinese, turned out to be a university lecturer in China. Together, we gathered firewood from the yard and lit the stove in the guesthouse’s living room. Soon, the warmth from the fire filled the small cabin, offering a stark contrast to the bitter cold winds that came down from the mountains.
Day 8: Ngawal to Manang
Hiking time: 4-5 hours
Elevation gain: +100m, loss: -200m
Leaving Ngawal, the trail descends to the old main trail on the road to Lower Pisang, where dust clouds swirl around us, which is no surprise since this section has been downgraded to a secondary route.
Before reaching the road, we pass through sparse forests and shrubland. The blue Marsyangdi River slices through the yellow mountain valley, and from above, the view is expansive and wide-open.
This part of road has almost no small shops or guesthouses, so be sure to pack a lunch and carry plenty of water.
Before entering Manang, we pass through a small town called Bragha, home to the famous Bragha Gompa, a Tibetan Buddhist monastery that is over 500 years old.
It’s said that Yak Burgers in Bragha are delicious. Since this dish isn’t on the ACAP menu, the price tends to be quite high. Another item available in the shops is a concentrated sea buckthorn juice, which is incredibly refreshing. During peak season, accommodation in Manang is in high demand and tends to be expensive. It’s worth considering staying in Bragha if you want to avoid the crowds.

Bragha Gompa

Manang (3,540m) is a commercial center in the region, with numerous small supermarkets, outdoor shops, pharmacies, a police station, an airport, and even a cinema that specializes in showing mountaineering films.
While searching for a place to stay in the crowded town of Manang, we ran into the Canadian couple again. They had booked a guesthouse for 800 rupees. If you find prices at the town entrance too high, consider walking further in, where the rates drop considerably. Eventually, we found a 200 rupee room with a beautiful view.
Most trekkers take a rest day in Manang to acclimatize to the altitude. However, since we had been trekking at a comfortable pace, we felt great and decided to skip the rest day. We made the decision to head out the following day for Tilicho Lake.
Tilicho Lake is the most famous side trip on the Annapurna Circuit, known for being the world’s highest lake, and for its stunning views of the Great Barrier snow peaks.
Day 9—Day 10: Manang to Tilicho Lake Base Camp
Hiking time: 10-12 hours
Elevation gain: +1600m
Leaving Manang, head northwest following the blue and white markers that guide you to the Tilicho Lake side trail. The path is generally okay, but there are some areas prone to landslides, which can be dangerous. The elevation gain is significant, so many trekkers choose to stop and stay in a guesthouse along the way.
Khangsar is the only village between Manang and Tilicho Lake, but it’s not the only place with guesthouses. After passing through this traditional stone village, you’ll continue for about 2 hours to reach Shree Kharka (4,045m), which has two guesthouses. Another small and less comfortable guesthouse is about 20 minutes further. During our stay, the owner’s child was ill, and they practiced a form of shamanic healing to treat the child.

Looking out from the Base Camp restaurant

Tilicho Lake Base Camp is located at an elevation of 4,140m. We had a meal at the Tilicho Base Camp Hotel, but prices were high, and both charging and Wi-Fi came with extra fees. The cost for a basic room was 1,000 rupees. If you’re just going to visit the lake, it’s best to leave your luggage at the restaurant and go lightly. I would not recommend staying here, as there is no electricity, no stove, and the long, cold nights are rather dull.

Approaching Tilicho Lake

Mist over Tilicho Lake

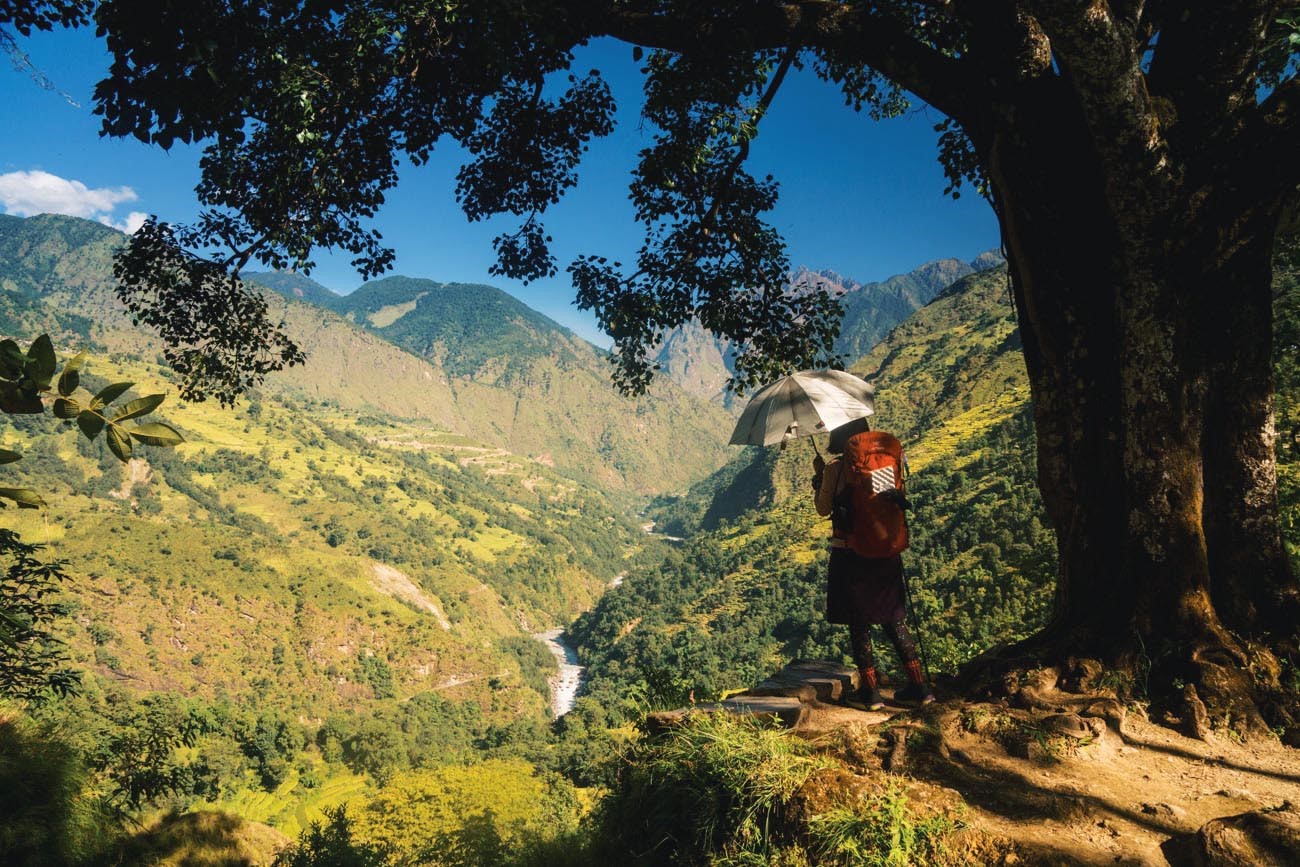
I asked several guides for advice about my plans, but they couldn’t offer much reliable guidance since most hadn’t trekked through the Mesokanto La Pass area. The only suggestion they gave was to take the northern pass, as it would be less icy.
From the base camp to the lake, there is an 870-meter ascent, which is quite steep and dangerous, with switchbacks along the rocky slopes. It’s best to avoid this route if it’s rainy.
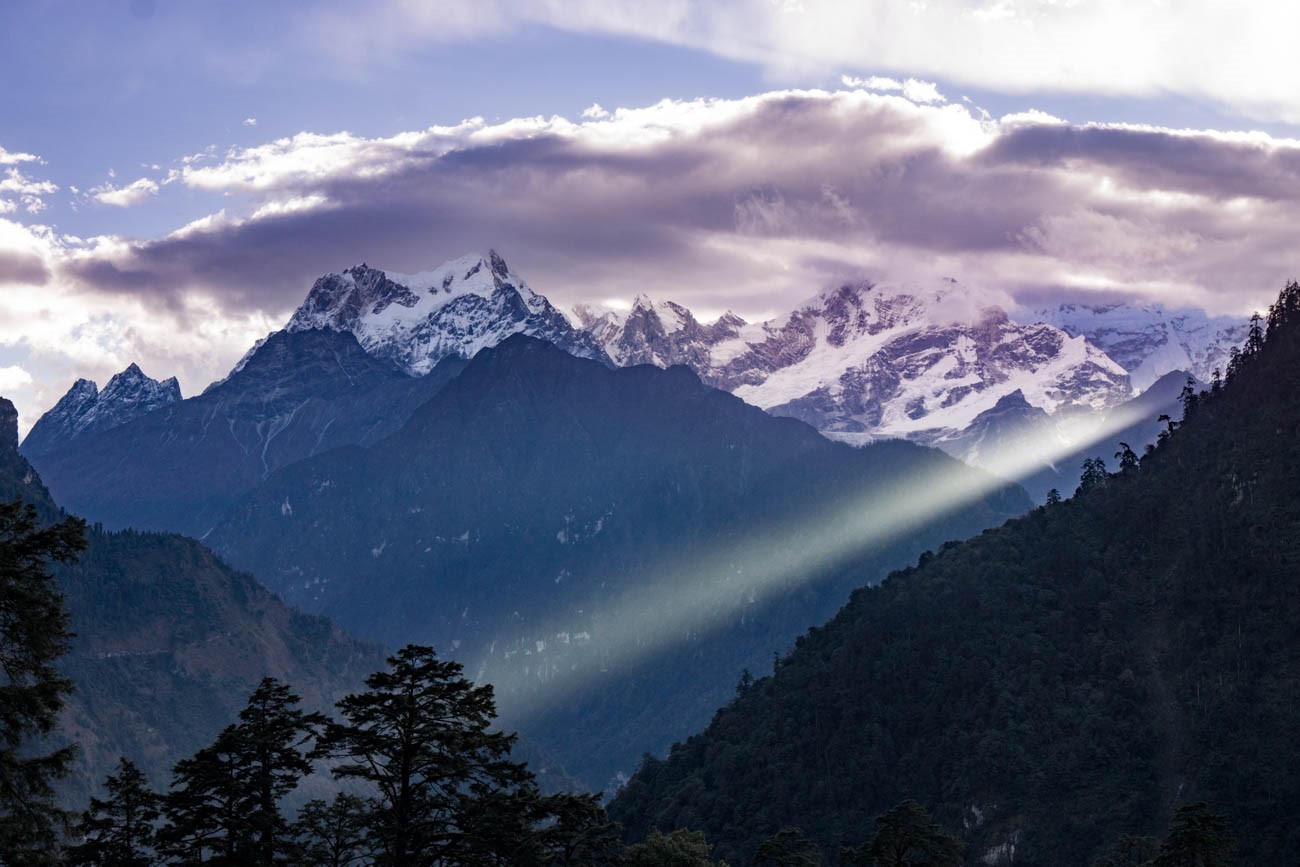
The lake, at an elevation of 4,920 meters, has crystal-clear water. On calm days, you can see the majestic snow peaks reflected in the water. However, most of the time, the cold winds make it difficult to enjoy the views. During peak season, from November to March, the surface of the lake is covered in ice and snow.
There are several campsites around Tilicho Lake, and most commercial expedition companies set up their camps on the north side of the lake, by a river, for easier access to water and better wind protection. We set up our tent beside a Tea House on the lake’s edge. It was sheltered from the wind, and the view was stunning. However, only 2-3 tents can fit in this spot.
At night, clouds and mist rolled over the lake, and temperatures dropped to below -10°C. Our ICEFLAME ultralight sleeping bags, which had just 520g and 640g of down insulation, weren’t enough on their own, but by stuffing them with clothes and wearing down jackets and pants, we managed to stay warm through the night.
Day 11: Tilicho Lake to 4600m Campsite
Hiking time: 8-9 hours
Elevation gain: +400m / Elevation loss: -700m
The morning sunlight illuminated the Great Barrier, and the warming rays triggered loud avalanches, with massive chunks of ice crashing into the lake, disturbing the once-calm mirror-like surface.
We packed up our frost-covered tent in the cold wind and continued along the trail to the right side of the lake, steadily climbing until we reached a barren high plateau. Here, we encountered the only hiker on the route, from California who was hiking in the opposite direction. We exchanged information about the trail and water sources.
There are fewer trail markers here, so it’s important to have a pre-planned route and strategy. Without proper preparation, it’s not advisable to proceed. The Mesokanto La Pass is not a single pass, but rather a region with three possible passes: two southern passes (5,250m) and one northern pass (4,540m), with the northern pass being the gentler one, also called the Tourist Pass.

Mesokanto La Pass

Regardless of which pass you choose, one common issue is the need for camping. The campsites are all above 4,500m, and the valleys after crossing the pass—Kaili Gandaki and Lungpuhyun—are the “Valleys of Wind.” You’ll need reliable camping gear to withstand the strong winds and cold temperatures at high altitudes.
Driven by curiosity, we chose to take the steep southern pass. Fortunately, there was no snow, and the difficulty wasn’t as great as we had imagined. In fact, many trails in China are similarly steep.
The 4600m campsite showed clear signs of human construction. If you move quickly, you can continue to the abandoned yak herder’s camp ahead, which is more sheltered and at a lower, warmer altitude.
Day 12: 4600m Campsite to Jomsom
Hiking time: 8-9 hours
Elevation loss: -2000m
Today, we will follow the trail along the right side of the valley, descending all the way. This section offers the best scenery of the entire Annapurna Circuit. Snow-capped mountains, forests, lakes, and wilderness—everything you could ask for. If you hike this route after November, the snow-capped mountain views will be even more stunning, but the difficulty will also increase.
After crossing the pass, the trail markers turn to red and white, but it is still a side trail. There are no large groups of trekkers, no villages, and no guesthouses—just pristine natural beauty.
If time and supplies allow, this section of the trail can be taken slowly, allowing you to stop for more photos and enjoy the mountain views. However, we were craving the roasted chicken down in the valley, so we decided to push on to Jomsom today.
Along the way, there are only 1-2 water sources, so be sure to bring enough water when you set out in the morning.
By the time we descended, it was dark. The dim lights of the old town in Jomsom were a bit disappointing. We crossed a narrow iron bridge, and the sign at the entrance read, “Don’t fight on the bridge.”
The guards at the temple entrance wore submachine guns across their chests but didn’t even glance at us. Foreigners here are more numerous than yaks.
The new town is about 1 km south of the old town, across the river. It’s busy with neon lights, upscale bars, and hotels, where the noise and chaos of the city seem to clash with the dust-covered streets. We began to miss the humble guesthouses on the other side of the pass, where trekkers would gather in warm dining rooms to chat or quietly read.
Day 13: Jomsom to Pokhara
Jomsom Road is a culturally rich tourist route. Mustang is a holy site in Tibetan Buddhism, and foreign tourists are very curious about it. This is the essential route to Mustang, and also a transit point for tourists.
Every day, numerous buses depart for Pokhara, with tickets costing about 1250 NPR. However, I strongly recommend flying, as it costs around 70-100usd. The road out of the mountains is prone to traffic jams and accidents, and these buses, which regularly travel on difficult roads, are also highly prone to mechanical failure. Some people pay high prices to hire off-road vehicles, but I do not recommend this approach. These vehicles are much bumpier than buses, and if there’s a traffic jam, they won’t be able to avoid it either.

Accident scene with a casual atmosphere, indicating how frequent such incidents are.

Local passengers squeezed in a small shop, drinking tea and chatting, with a very harmonious atmosphere.

Unfortunately, we were unlucky—our bus broke down, and we spent 3 hours waiting in a dimly lit shop with the locals while it was being repaired. Later, we shared a ride in an off-road vehicle with several European trekkers, which also broke down on the way. We eventually flagged down a bus on the road and ended up sitting in the aisle until we got to Pokhara, where we didn’t get off until past 1 AM.
The bus stop was in the old town. Two trekkers, unhappy with the local taxi drivers’ exorbitant prices, said “We are trekkers,” and resolutely walked to the lakeside area in search of accommodation. The two of us, along with two French tourists, were concerned about safety at night, so we shared a ride and found a garden hotel called Blue Planet.
Pokhara is a paradise for outdoor activities like paragliding, rafting, and mountain biking. However, after more than ten days of trekking, I only wanted to do one thing: eat.
Moon Dance Restaurant is one of the most popular Western restaurants in Pokhara, and it’s very busy, with window-side seats requiring a reservation. The AoZoRa Japanese restaurant offers delicious teriyaki chicken rice, Far West Hunanserves tasty meat sandwiches, and the best recommendation is Sanchon Korean Food—though the menu is limited, the flavors are truly amazing.
Rafting is a must-do for almost every tourist. If you have time, I strongly recommend. There are Class 2–Class 4 rapids to choose from, with the higher levels being more fun.
Additional Note
We skipped the section of the route from Jomsom to Naya Pul due to time constraints. This is the traditional end point of the Annapurna Circuit. The winding mountain road follows the Kali Gandaki River Valley south, with very few trekkers along the way, likely due to the road being open to vehicles. If you have time, I recommend taking this route for a more peaceful experience and a chance to visit Poon Hill for the spectacular views of Machapuchare.


Equipment
For this trek, I used the 3FULGEAR Lanshan 2 tent, an ICEFLAME sleeping bag, and a test backpack. The backpack featured an inflatable back system, but the experiment had negative results as the inflatable frame couldn’t provide long-term support. Therefore, this model was not mass-produced.


Trekking Tips
Permits:
To trek the Annapurna Circuit (ACT), you need two permits: the Annapurna Conservation Area Project (ACAP) Permit and the Trekkers’ Information Management System (TIMS) Card. These permits can be obtained at the Nepal Tourism Board in Kathmandu (closed on Sundays). The total cost is around 250 NPR. You just need to bring your passport and cash, and photos will be taken on-site for free.
Accommodation:
You can stay in lodges throughout the trek without the need for camping. However, if you plan to go through the Mesokanto La Pass, you must camp for two days. Before Jomsom, accommodation prices range from 10 to 30 NPR for a twin-bed room, but you must eat at the lodge where you’re staying.
Transportation:
The best way to find public buses is to ask a taxi driver. They will take you directly to the bus station, which is the most economical option. There is no need to go through a travel agency or lodge to find transportation.
Food:
A single meal typically costs between 30-50 NPR, with a menu that includes Western, Nepali, and Tibetan dishes. The menu along the route is standardized and regulated by ACAP, so the prices are controlled and generally correlate with altitude. You won’t find meals that are too expensive or too cheap. Food at lodges tends to be more expensive, while tea houses offer cheaper options. For lunch, I recommend eating at a tea house.
Water:
Most lodges offer boiled water for sale. In some towns, you can buy purified water at water stations, or you can buy bottle water at shops. However, all three options are relatively expensive, so it’s advisable to bring a water purifier and outdoor stove.
Water Stations:
The following towns have water stations: Tal, Bagarchhap, Chame, Pisang, Hongde, Manang, Letdar, Thorung Phedi, Muktinath, Kagbeni, Jomsom, Marpha, Tukuche, Khobang, Larjung, Lete, and Ghasa. The price is 40-60 NPR per liter, and if you don’t have a water purifier, this is the most economical way to get drinking water.
Medical:
Along the route, at least four towns have pharmacies and hospitals. Doctors can communicate in English.
Resupply:
You will pass a lodge or small shop every two hours on average.
Charging:
Most lodges along the route provide charging services. The majority of them offer free charging, but a few may charge a fee. During peak season, power outlets can be scarce, and there may be occasional power outages. I solved this issue by using an ultra-light solar panel.
Internet:
Though most lodges advertise free Wi-Fi, but poor speed. In major towns like Manang, Chame, and Jomsom, the internet is faster, and there’s usually a mobile network signal.
Porters and Guides:
Porters and guides are not mandatory. Most trekkers do not hire a guide or porter. However, if you hire a local guide, lodging costs may increase significantly. Hiring a guide or porter provides local employment and supports a family’s livelihood for up to six months.
Trail Markers:
ACAP marks the main trail with red and white markers and the side trails with blue and white markers.
author avatar
3FULGEAR