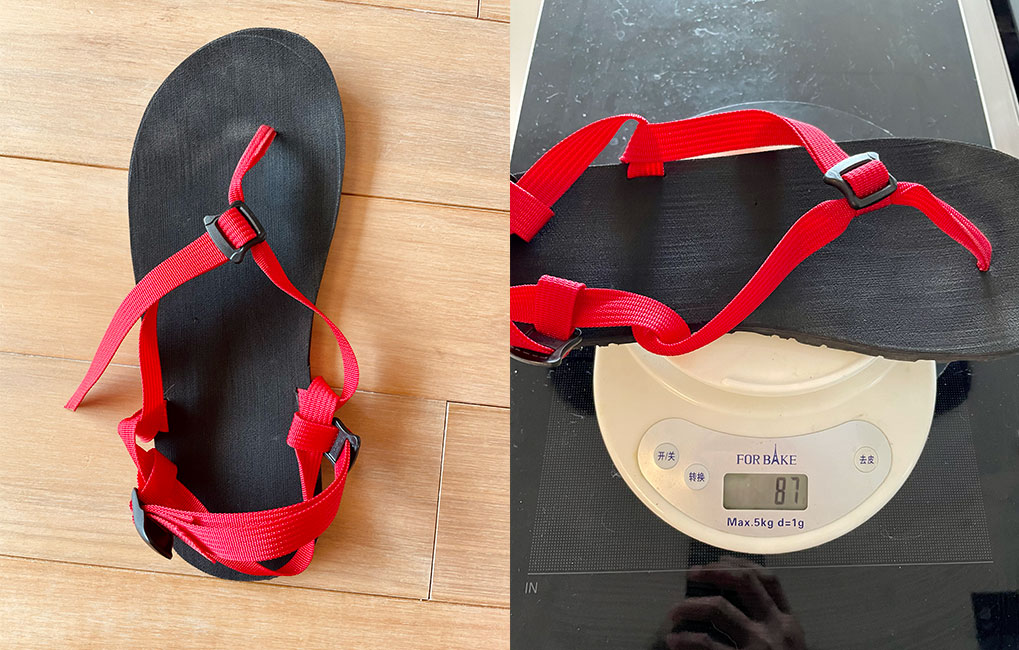
Sandals are very important in long distance hiking, you can’t wear hiking shoes or boots all the time after arriving at the camp, putting on sandals can make your feet feel incredibly relaxed, and sandals are even more important when crossing rivers and bathing, the normal sandals are heavy, at least 200 grams a piece, wet sandals are also very slippery, not safe for use when crossing rivers. This is when we need to prepare a pair of hiking sandals.
I was deeply influenced by the idea of born to run when I contacted barefoot running in 2017, and I walked hundreds of kilometers in a pair of luna sandal at that time, but I was very dissatisfied with the luna, it was heavy, the sole and the upper would slip when wet, and it was especially easy to stink my feet, so I decided to DIY a pair myself.
It probably costs about $20 to make a pair of hiking sandals, and can take an afternoon to do by hand.
Before that, you’ll need to get a piece of foam rubber sole, which is easily available on Amazon Japan for about $15. In addition you need some rope or webbing, if you can buy buckle on the better, can not buy it does not matter, with knots can also be.
After you prepare all the materials, please prepare 2-3 hours to do the handiwork.
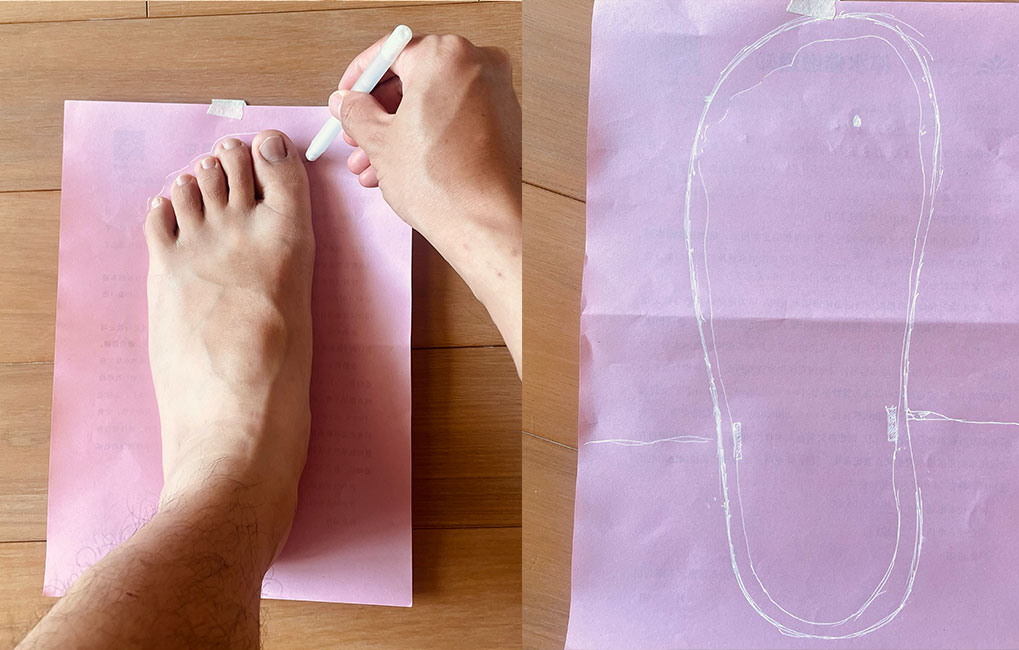
1. draw the outline of your own feet on a piece of paper.
2. Draw the outline of the sole according to the outline of your foot.
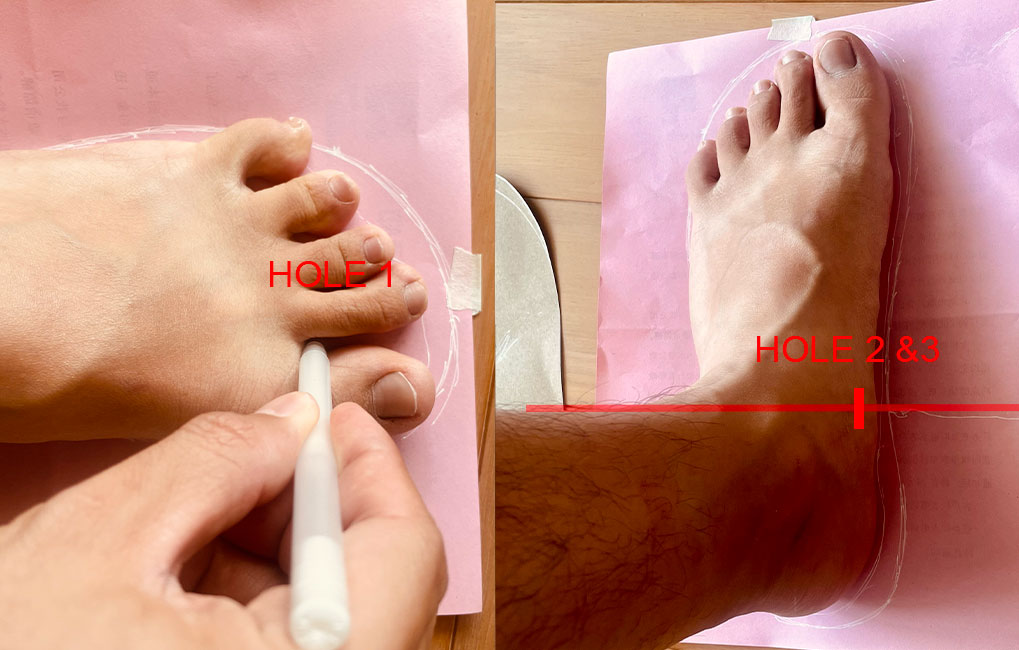
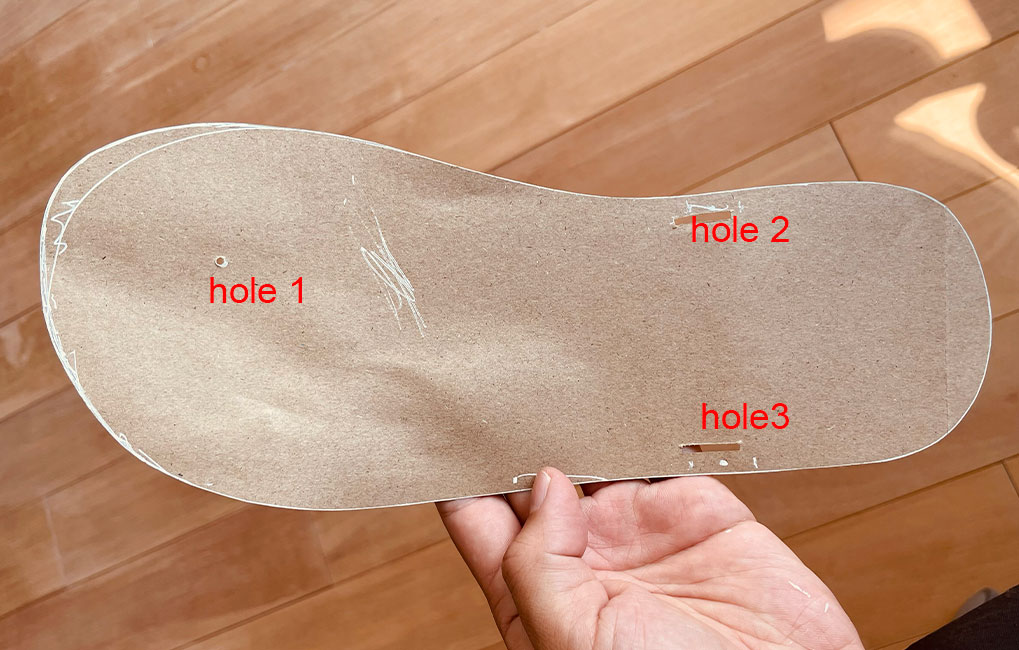
3. Determine the location of the 3 holes, the first one is the hole next to your big toe, use a pen to point a dot. The second and third holes should be determined according to the position of the very front of your calf shin, draw a line on the paper flush with the front of the shin, move 1 cm inside the sole according to this line, this is the location of the string, determine the size of the holes according to the width of the webbing you use.
4. Plate making: Cut down the cardboard with a hobby knife, draw the final sole shape on a piece of heavy cardboard and cut it out. put the cardboard on the rubber sole and draw the outline on the rubber.
5. Cut down the rubber bottom with a hobby knife and punch holes with a hand drill. If you use webbing, then you need to cut a long strip-type mouth, which is very simple: Using a drill no more than 3mm, drill two holes spaced 1.5cm apart, and then cut the middle part of the two holes with a blade.
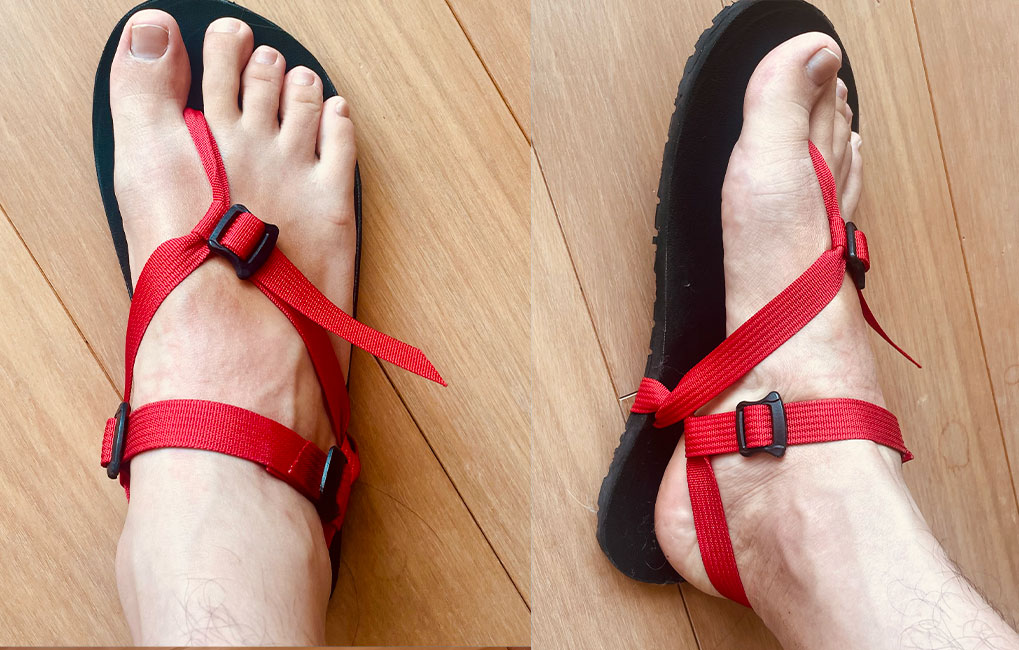
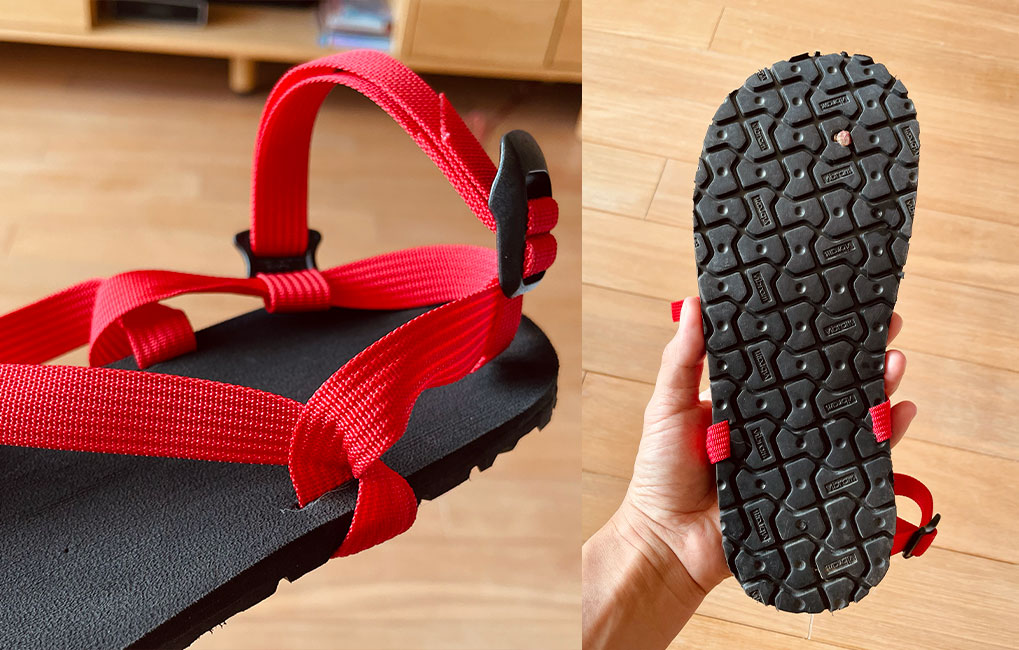
6. There are many ways to put on the band/webbing or cords, you can refer to my way of putting on the tape. Or create one for yourself, there is no principle to follow, as long as you think it looks good. The strap on toe side is not easy to fix, I use fire to melt the top, solidify it into a T-shaped top, which can prevent the webbing from falling off.
This way an ultra-light sandal is made and you can run a few miles in it to try if it suits you.
For the record, we don’t mass produce these sandals, I just wanted to share a DIY process.